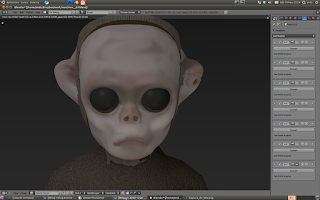
This is Mon (monkey).
What started out as a quick and dirty test for Blender's fur. It actually ended up looking better than I thought so It was worth a little more effort at the end. But if I new that I was going to like it so much I would have probably done some steps differently.
Concept
The idea was to replicate a photograph I've seen of a small monkey on a tree branch, I thought that it would be a perfect example to try out the fur engine.
Modeling
I started the process by doing a very rough 3d sketch of a monkey in the classic T pose so I could rig it and then change it's pose as I wished, that way I could get the proportions a bit easier. Once rigged and posed, I separated the head mesh and sculpted the details only on the head. I've never even subdivided the rest of the body mesh for the final rendering since it was going to be all covered up. This process was so quick that I think I did it in less the a hour. After that I deleted the bones and made some final adjustments pulling the vertices around, specially because the rigging and skinning was so rough that I ended up having some bad triangles, etc.
Fur
The process for the fur was pretty straight forward, but since I was learning while making it I did had to go back and forth a few times. But most of all it all went well, Blender's fur tool are great for adjusting it's length, shape, combing, kink, etc.
At some point I reatached the head to the low poly body because I wasn't understanding how the fur shading was working, and for some reason there seemed to be a lack of shadow from the head's fur to the body's fur. But it was not, maybe it was the light setup that I had.
A few tips:
- I separated the fur according to vertex groups for easier grooming, like left arm, right arm, left leg, right leg, torso, tail and head, that way I could turn them on/off so I wouldn't groom the wrong part by accident. It may also help on "heavy fur" models, but in my case i had about 50 to 80 thousand strands on each of these parts and a lot of time I had all of them (~600.000) turned on and had no visual lag on the viewport, only when adding or removing strands, probably because Blender was trying to rearrange their children position and interpolation.
- Another useful feature was the ability to paint influences like fur density, length, clump, kink and roughness.
Looks
I painted the face texture directly inside Blender, and also spent no more than 15 minutes unwrapping and painting it , that can be easly noticed on the quality of the painting below. :-)
I used a sub surface scattering material and most of the texture's imperfection were not noticeable anymore.
 |
| Beautiful mapping :-) Can you spot the nose texture repeating on his left ear? |
The final render was done with 2 area lights and no global illumination or ambient occlusion, so it was really fast, about 6 minutes at 1920 x 1080 with 16 samples for anti aliasing on my Intel Core2duo.
Cheers,
Andz


No comments:
Post a Comment